Ways to Use an iPad for Productivity
Contents
Planning a Project
Planning Images and Videos
Writing
Coding, Editing and Testing
Apps I Use for Productivity
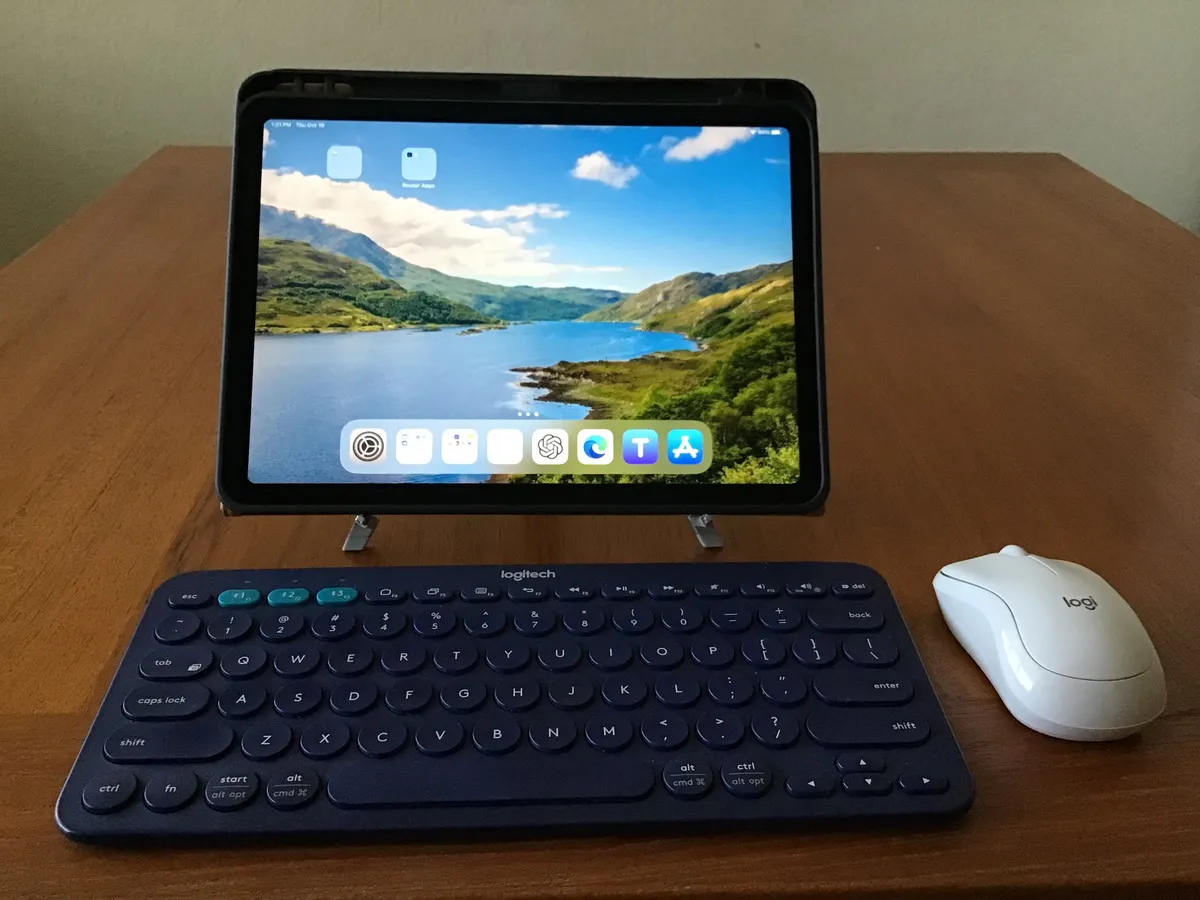
Before I start writing about using my iPads for productivity, I think it might be helpful to know what hardware I use to aid in my work. My iPad Air 5 is in a sturdy case that I bought on Amazon and it's made by DTTO. Since the case if quite thick, the Air 5 wouldn't fit on most stands. All of my iPads are in similar cases and years ago I found this wonderful stand from Twelve South that is perfect for iPads in sturdy cases.
I've always liked Logitech keyboards and mice and that's what you see in the photo above. The keyboard, as you can see has round keys, a feature of it that I love. To me, the keys feel more natural than the usual ones on keyboards. The keyboard is the Logitech K380, and it's a very popular model. I've owned it since 2016 and it still works like it did back then. It uses two triple A batteries and I use good rechargeable ones that seem to hold a charge forever. I can use it with all three of my iPads and to switch from one iPad to another is simple. I just have to press one key and the iPad and keyboard pair instantly.
The mouse is the newest addition. I recently bought a table stand so that my iPad would be at eye level and I'd have fewer back problems. But then I realized I needed a mouse to avoid arm issues, so I checked out mice on Amazon, searching for one just right for my small hands. The mouse you see in the image is the Logitech M240. Unfortunately, the mouse doesn't pair easily with more than one device, so I use it only with the iPad Air 5.
I use my iPad Air 5 almost exclusively for productivity tasks, that is, mainly for my blog and other websites. I always start with getting my preliminary thoughts written down, either on actual paper or on a notes app. I then start on a planning stage, where I gather notes and ideas from experimenting on my iPad as well as from online resources. Once I have enough information gathered, I like to organize my thoughts with a mind map. Next, I start to list images and videos I might want to add to my blog posts.
The next stage is when I start to do my writing. I start with drafts but quickly move to adding coding. Once I have a draft written, I transfer it to my preferred coding app for editng.
The last stage starts with testing that everything works right offline. Once I'm happy with the content and all links seem to work, I upload the final post to my website.
Throughout all of the stages above, one thing is constant. I save my work to at least two different cloud services. I'm obsessive about saving my work because of past experience. While working on my dissertation, I lost a section of it and didn't have it saved and had to completely redo the section. So now, I save and save and save since rewriting something from scratch is not a task I enjoy.
Planning a Project
After using iPads for thirteen years, I have plenty of ideas for blog posts. But I still like to use outside resources to stretch my mind. I always start by selecting a topic that interests me. For example, for this blog's first theme, I wanted to see if there were ways I could improve the way my home screens look and work.
Once I've decided on a topic, I search for more information on it. Naturally, for this blog, I start by actually experimenting with the topic on my iPads. I like to try things out on both my Air 5 and at least one of my iPads using iPadOS 15 to see how things have changed in the last two years. As I experiment on my iPads, I write notes on what I'm doing, sometimes with the Apple Notes app or Notability, or the old fashioned way with real paper and pen.
After I've experimented on my iPads for awhile, I usually have some questions on how something worked or didn't work. This is when I start checking other sources. I usually first head to Apple's own documentation. If I'm still curious or unsure about something, I go to a browser, usually Edge and the Bing search engine, or to Microsoft's newest AI app, CoPilot, to help clarify the problems or questions I have. Again, I take notes, this time usually with Apple's Notes app. I like using that app for quick notes since I know the information will automatically sync with iCloud and be available to me on all three of my iPads.
Once I've completed research for my theme, it's time for me to organize all of that information. In the past, I've always done that on paper, but that's not very efficient. So, a few weeks ago, I decided that I needed a good mind mapping app. I searched for one that didn't require a subscription and that was better than Apple's Freeform app. I tried the free version of SimpleMind and really liked it, and when I saw that I could save my map as an outline with the pro version, I immediately purchased it and I'm glad I did. It's not an expensive app, syncs seamlessly with iCloud, and can be used on more than one iPad, and it is very easy to use.
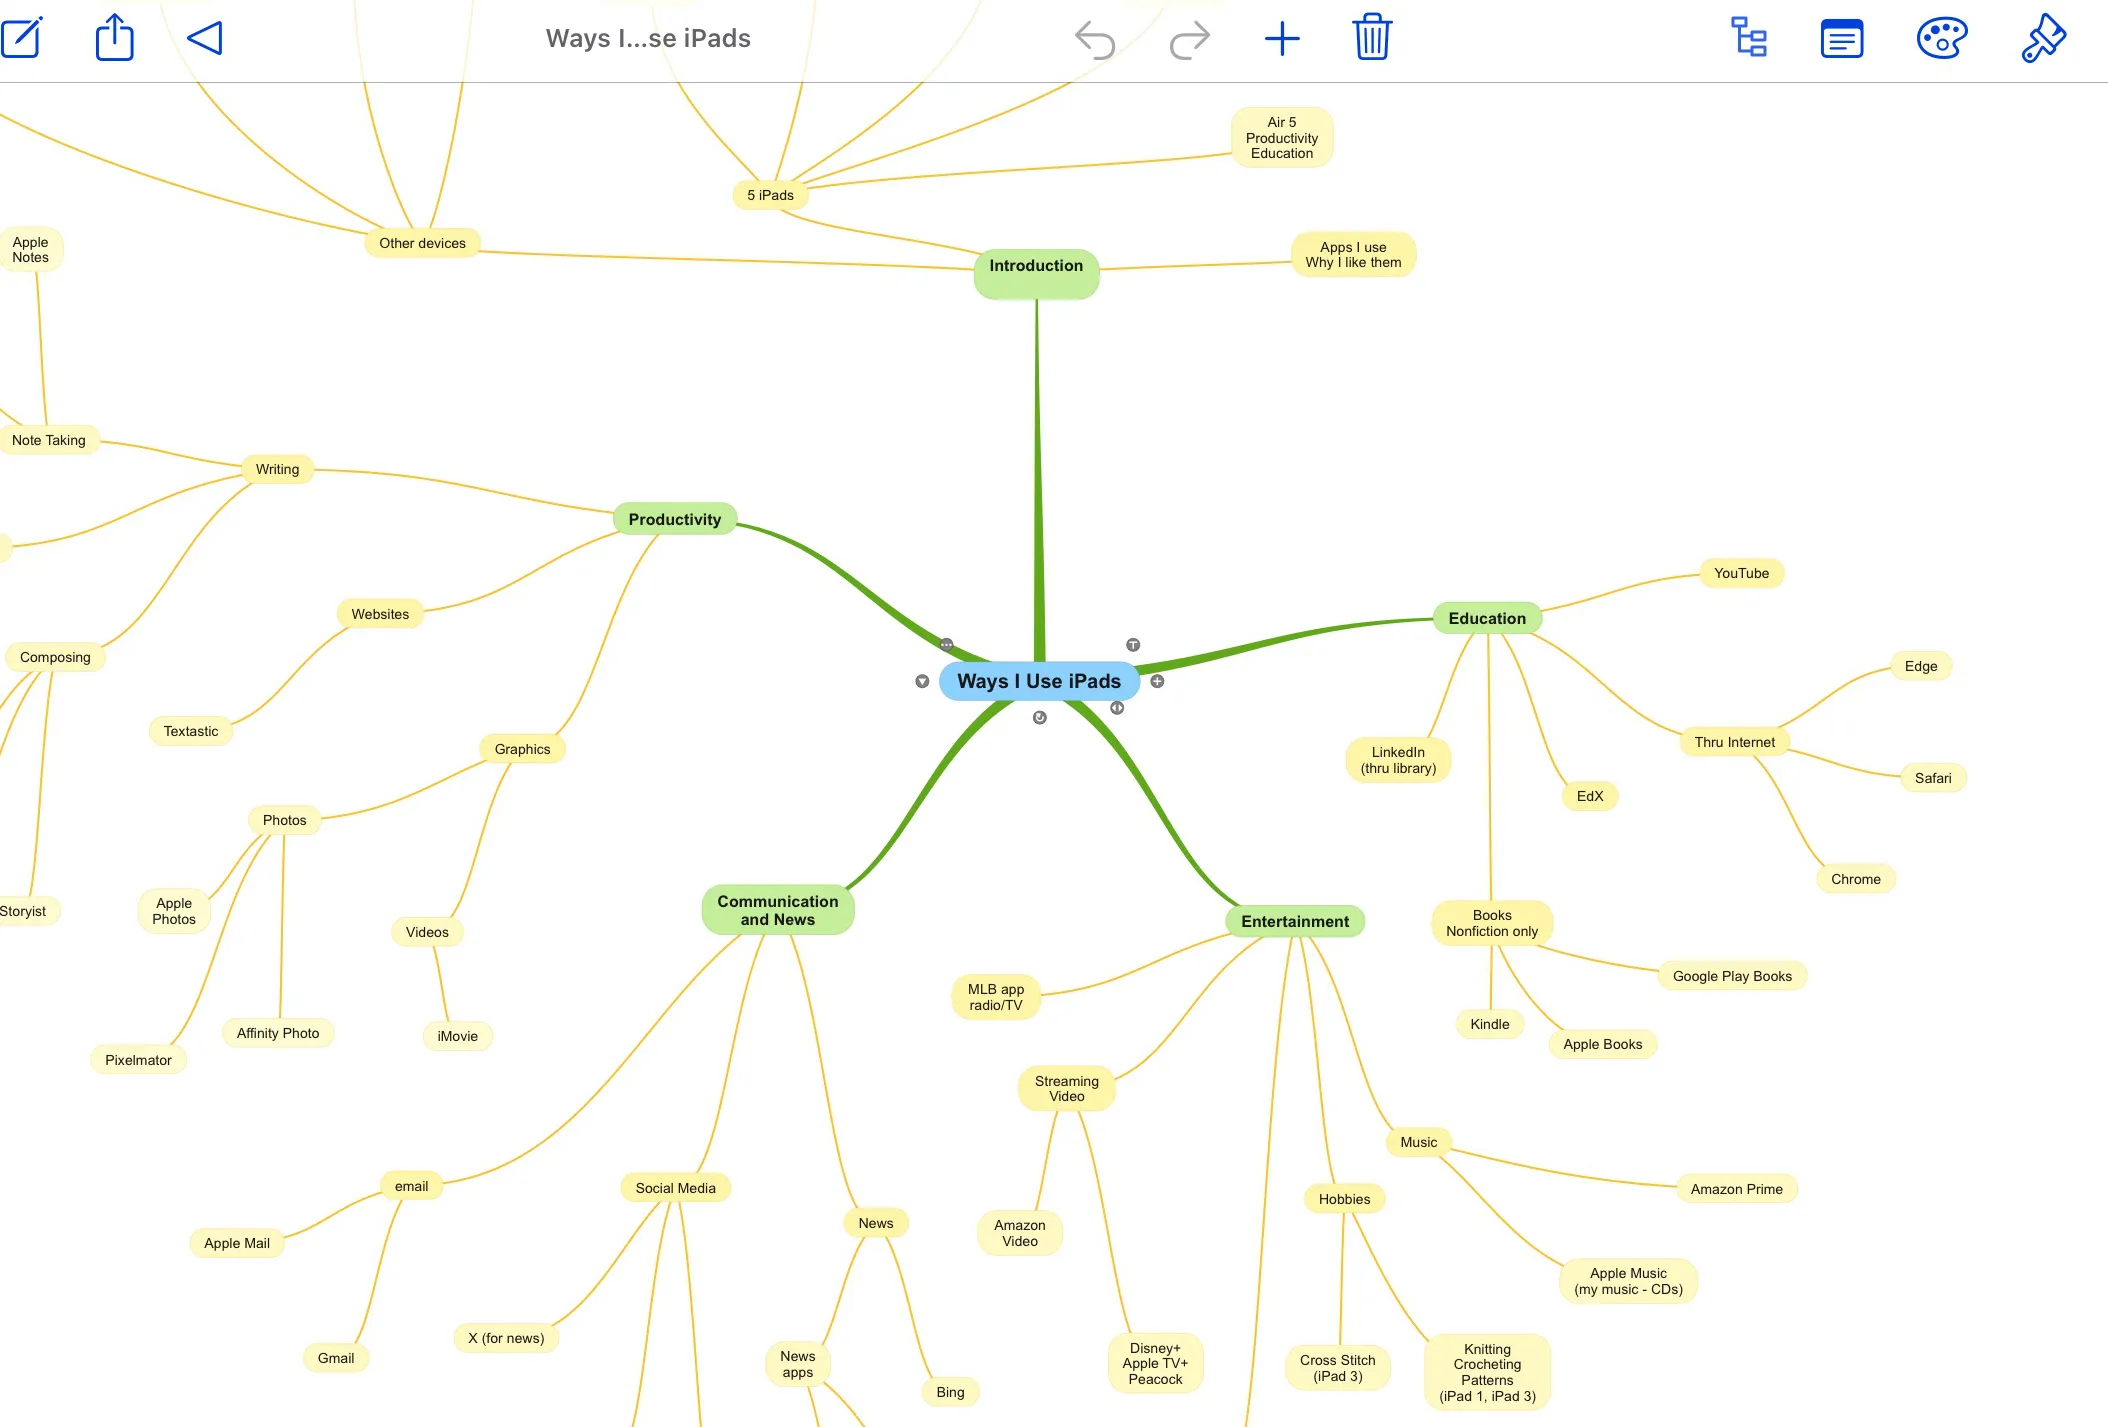
SimpleMind is exactly what I need to organize my notes. In addition, it helps me expand my notes into additional ideas. I've found that for some themes or articles, like this one, using it as a first step works great for me. Clearly, for this theme, I didn't need to do research since it's based on my own experiences, and using SimpleMind helped me organize categories and subcategories for all the ways I use my iPads. I like being able to visually organize my ideas in a more expanded way than I could previously do with just a note taking app. SimpleMind lets me use an app that works well with the way I do my initial thinking. My writing is linear but my thinking is not.
One of the features I love about SimpleMind is that it creates an outline from a mind map that can be viewed and edited in the app. Once I have the outline arranged in a way that makes sense to me, I export it to Notability. This is an app I've owned since 2013, but I never used it very much until now. When I decided to start this blog, I started using Notability to write and organize my ideas for the blog. I've also used it extensively for information I gathered from other resources. I still don't use its full capabilities, but for the $2.99 I paid for it more than ten years ago, it's been a bargain app. It's now a subscription app, but the company still issues regular updates for it for users like me who were lucky or smart enough to purchase it years ago.
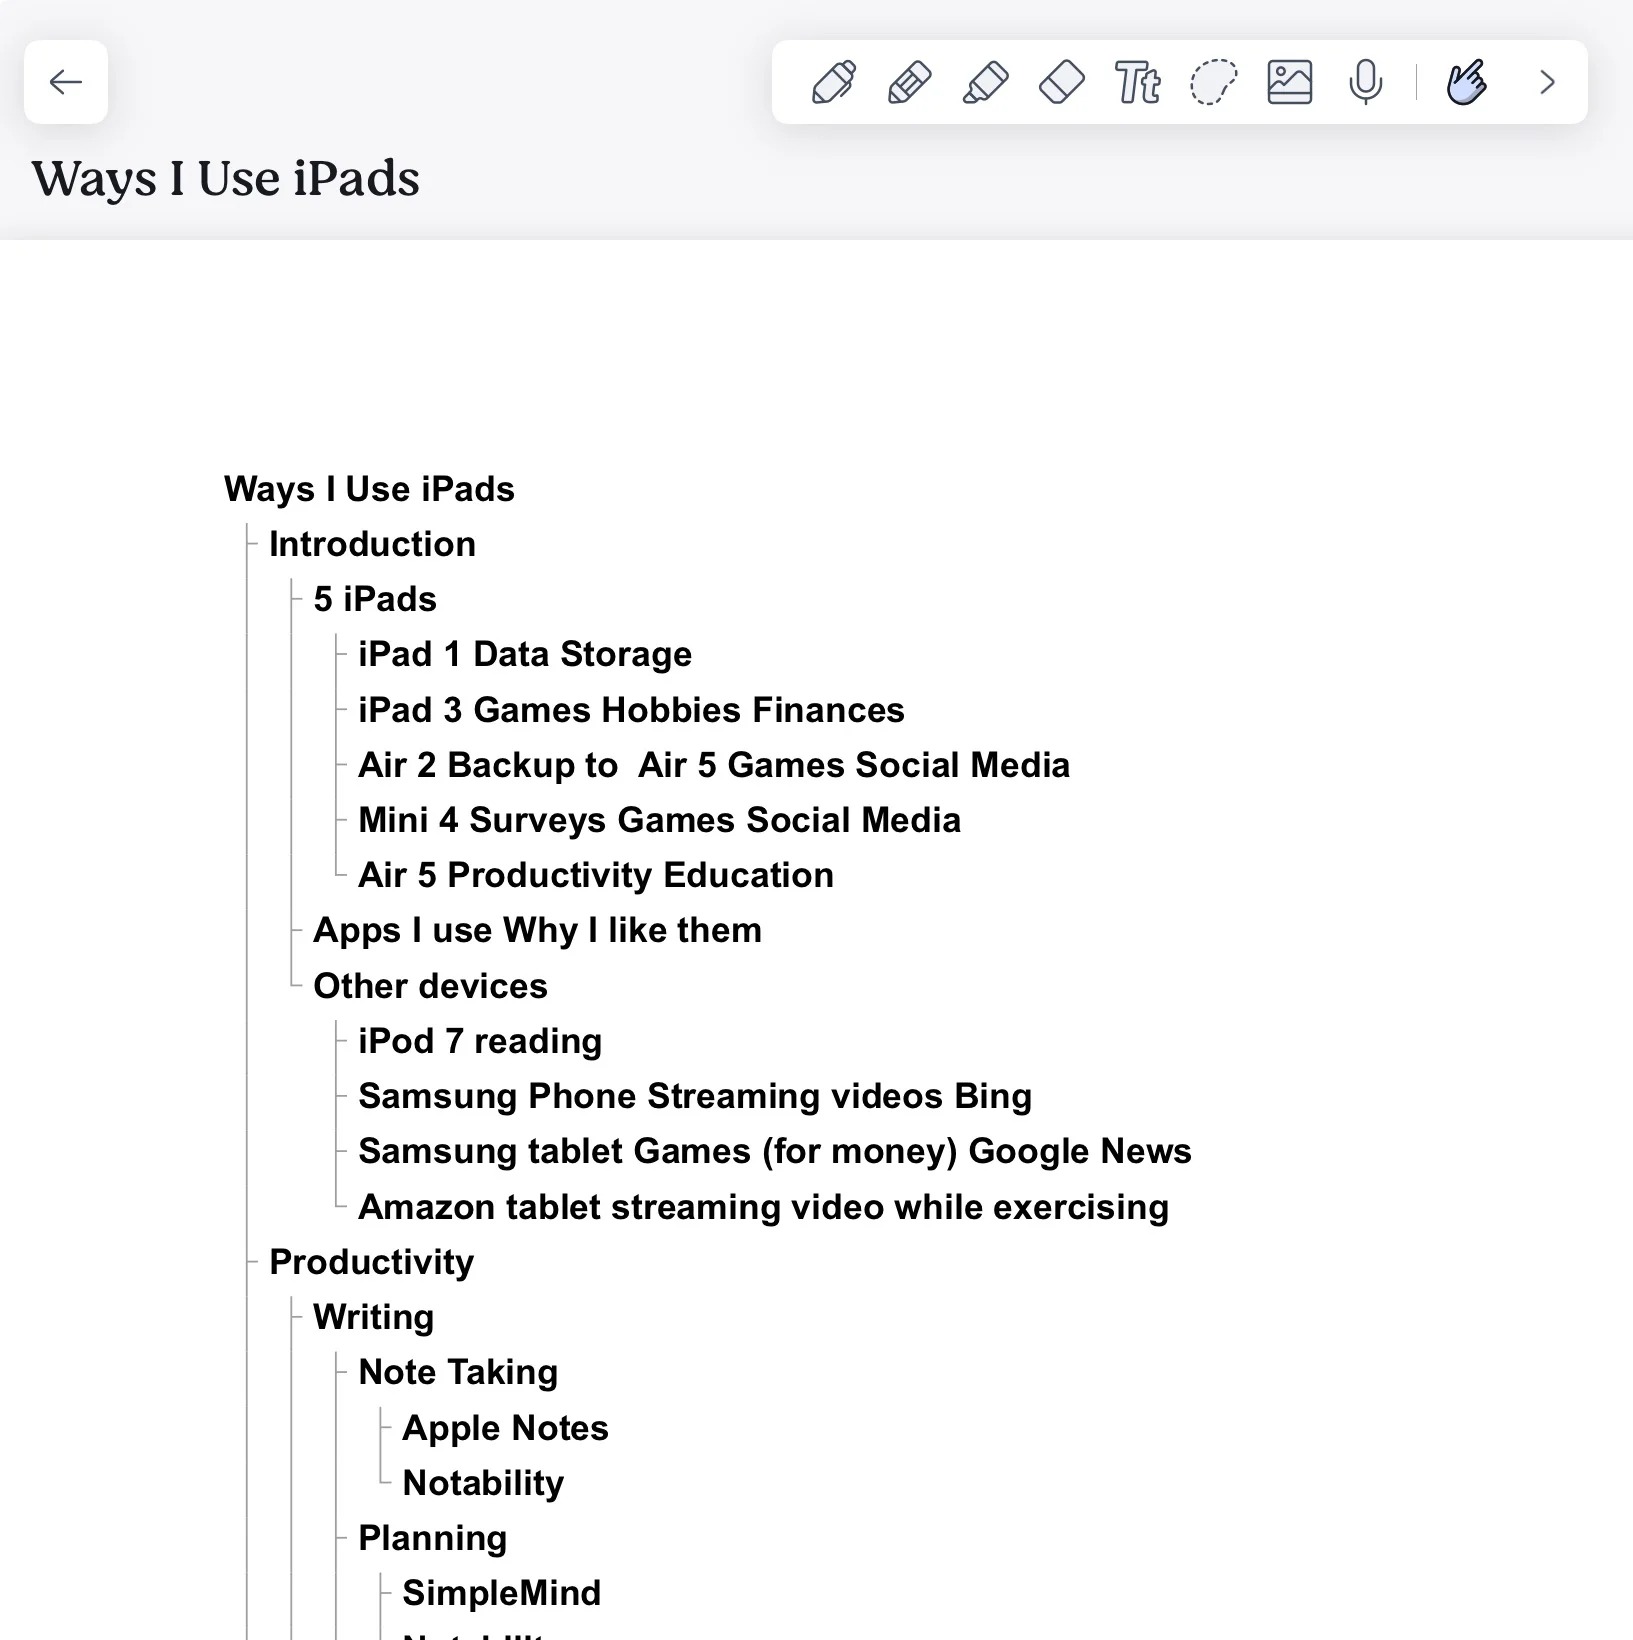
This stage was for global planning of an entire project or theme. Next, I start working on details, beginning with graphics I might need for the entire project.
Planning Images and Videos
At this point, my notes are organized, I have an outline with headings and subheadings, so I'm almost ready to start writing. But for a blog like this one, I need images and videos to help explain my tutorials or enhance my articles or reviews. This is when I leave note taking and planning apps and move to graphics apps. This is my weak area and one I want to spend more time improving. It's also the area where I use the fewest and sometimes most basic apps.
Before actually creating images, I look over my outline and decide which sections need images. I make a list, usually on paper, and then decide how to best create the screenshots. Once the screenshots are created and converted, I place them inside my writing app's folder for the project.
For the images on this blog, I initially converted the photos to jpeg format using a shortcut on the iPad's Share menu. However, I recently purchased Affinity Pro 2 for iPad and I now use it as my main photo editing app.
I approach video files similarly, starting with making out a list of possible videos to fit the different steps in a project tutorial. I use the iPad's built-in video screen recording feature to create my very short and simple videos. Since video creation is something new for me, I haven't decided on a program that will work best for me. For my earliest posts, I used the very basic Apple iMovie app to save the screen recordings so that they will be smaller in size and, therefore, load quicker. I've started working with DaVinci Resolve for iPad and that saves video files in a smaller size, while retaining the original quality so I'll probably be using that for future blog posts. Viewing the videos is always optional for my readers and they're stored on a separate website I created just for the videos.
Writing
I first started using an iPad for writing in 2012, when I purchased a copy of Apple's Pages app. It's now a free app, but back then it was a fairly expensive app at $9.99. I had tried using free writing apps but they just didn't work well on early versions of the system software. I never really liked Pages but it worked well enough for my needs at the time, which were limited to basic personal needs. I did most of my writing and publishing to my websites initially on a MacBook.
In September of 2013, my writing plans changed when I purchased a copy of Textastic. I now could do everything I needed to do for my websites directly on my iPad 3. About a year and a half later, I purchased my Air 2, and I finally had an iPad that almost completely replaced my computer. I'm not sure which app I used for writing my website pages and blog posts. I may have continued writing drafts with Pages or I might have done all of the writing in Textastic. However, that changed in early 2015, when I purchased a writing app called Nebulous Notes. A year later, I purchased Drafts, a writing app that gave me the freedom to completely stop using a computer.
The developers of Drafts decided to change to a subscription model a few years ago, but the old version worked fine for me until last August, when I decided that I would start this blog. That's when I started looking for a more complete writing app, and Storyist was the best option for the way I work. It's designed primarily for writers of novels or screenplays, but it also works well for me. It syncs with iCloud and that was a key feature I needed and wanted. I also like the organization features that let me store all of my files and images in a single file, without my needing to set up initial folders. I can, however, add more folders if I need them. I can also create templates to match the needs of a project.

I'm still learning Storyist and I haven't quite figured out the outlining feature, but with SimpleMind creating outlines for me, I have less need for it in my writing app. I also like that I can use it with both iPadOS 15 and 17, so if my Air 5 is on the charger and I feel like working on a blog post, I can always use my Air 2 iPad and know that whatever I write will be automatically available to me when I go to the Air 5 iPad.
Once I have my drafts written, I copy them into web pages I've created in Textastic. While drafting a blog post, I use a template I created in Storyist that contains some of the coding I need for the web pages. I also include the coding for possible images and videos, headings and subheadings, and lists. All of this makes the editing, coding, and testing stages easier and quicker. I do my editing in Textastic because I need to see how the final copy will look when it's posted on the internet. So writing begins to overlap with coding.
Coding, Editing, and Testing
About twenty years ago, when I was teaching at a university, I fractured my wrist and had to stay at home for several weeks. My students, however, still needed to learn so I taught myself enough HTML coding to create a simple website and prepare online lessons for them. Over the years, I've taken a few online courses to advance my skills in web design and coding. Now all of my websites, including this blog, are completely designed and coded by me.
Before purchasing Textastic, I used an iPad coding program called Gusto. It was okay but Textastic extended what I could do on the iPad. I store my blogs and websites offline on my iPad and post pages and images and videos only when they are ready for public viewing. This means I can do all of my work for the sites on the iPad while I'm online or offline. It also means I can test everything offline prior to actually uploading a post to my blog. With Textastic it's very easy to add images and videos to my websites before I actually need to upload them to the internet server. All of this makes it the perfect app for someone like me, who enjoys coding and writing.
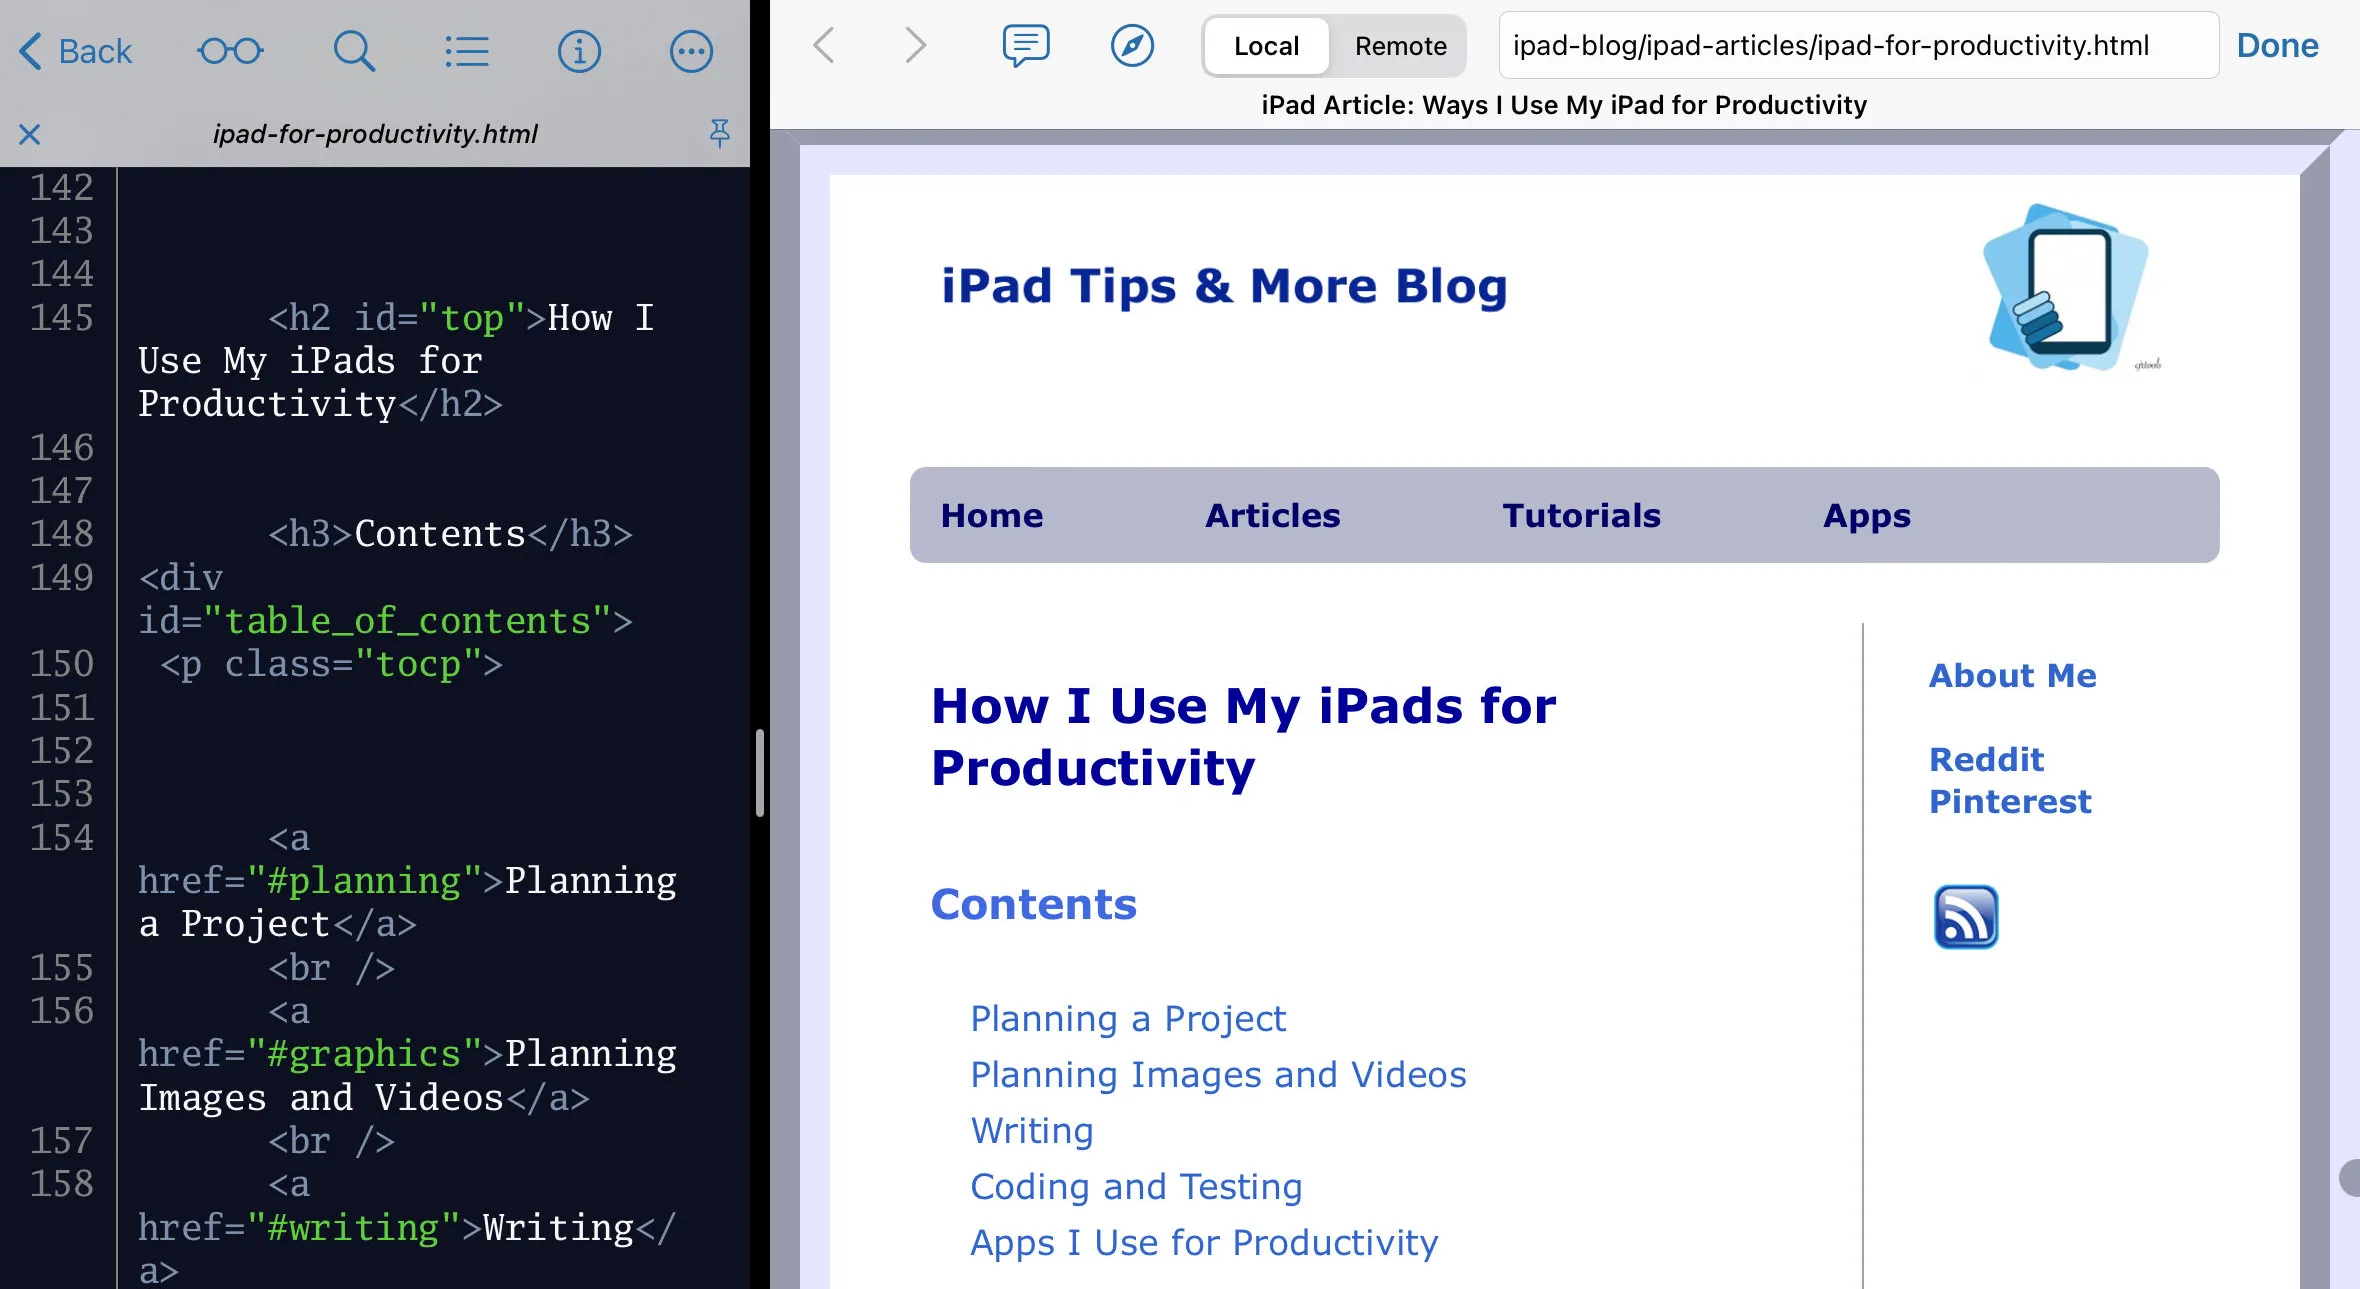
Although I do my final edits of blog posts in Textastic, the first drafts have already been revised. I tend to often revise content in my head as well as while I'm writing. So by the time I'm working on a blog post in Textastic, it's already been revised several times. The editing I do at this stage is to see that the content is accurate, links work, spelling and grammar are correct, and the language flows.
Uploading the page comes next and this is very easy with Textastic, which is another reason I love that app. Once uploaded, I again test that everything works on all three of my iPads. Even though this blog looks best on an iPad, I have made it mobile friendly so that it can be viewed on an iPhone. Obviously, viewing the images and videos on a small screen is not nearly as good or helpful as on an iPad.
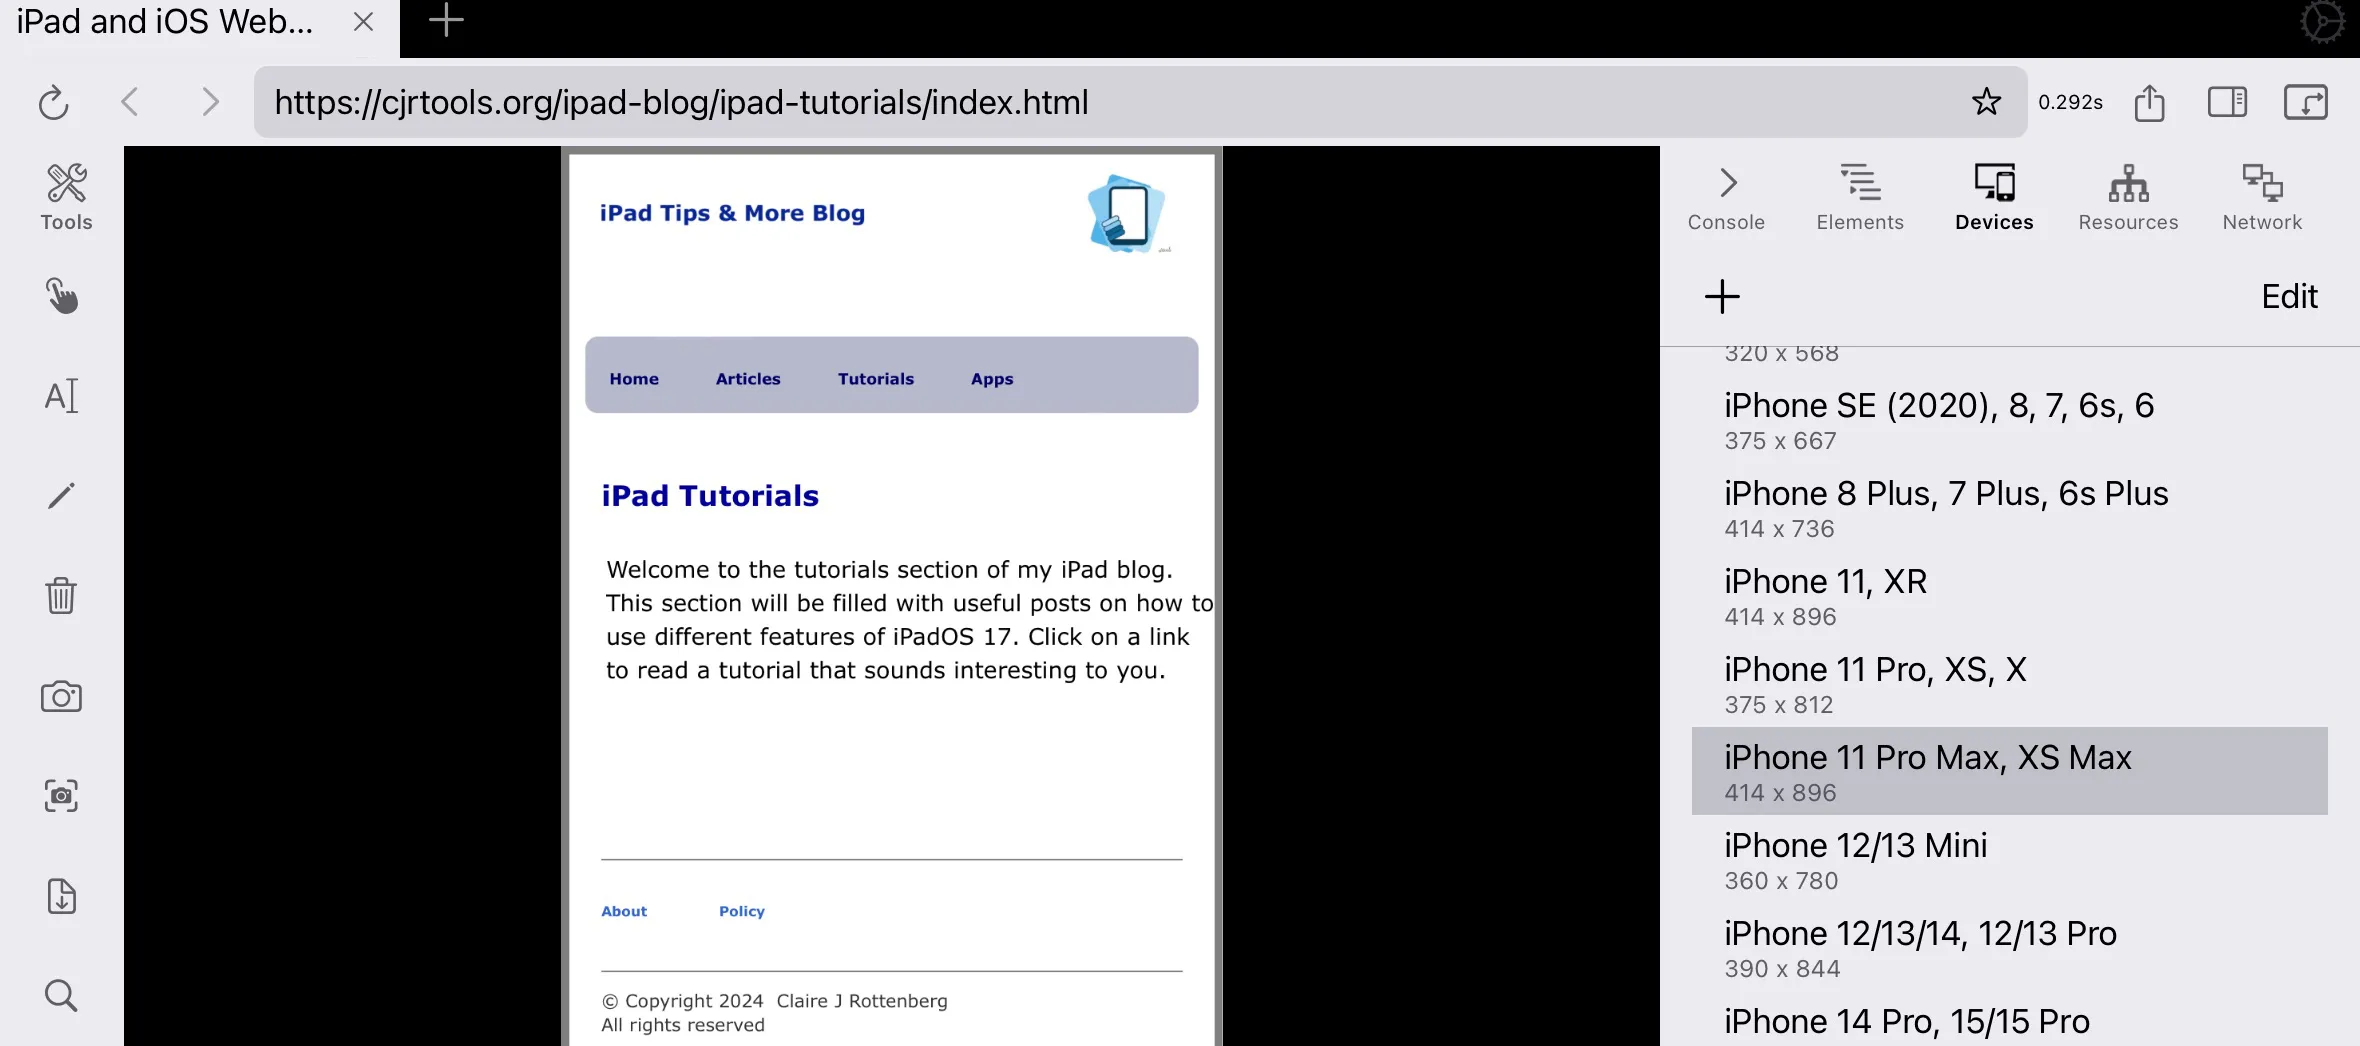
An app I purchased about a month ago is called Inspect Browser. It does several things that can benefit website developers but for me, it does one thing that was essential. It lets me see how my site looks on a variety of different Apple devices, including iPhones, iPads, and computers. This app is a great help in designing mobile friendly websites. And since I don't own an iPhone or every model of iPad, this app has been a great help for designing and coding my blog.
A final coding activity I like to do for some themes is to create shortcut apps to complement the concepts in the posts. When I had my Mac ebook business, I used Apple's Automator app, which is similar to the Shortcuts app, to create apps for the chapters in the books. I included the instructions for the Automator apps both in the books and on my website and my customers and readers often commented to me on their usefulness. I also do them because they help me become more efficient in using my iPads, and because they are fun to do. I hope you, too, will enjoy them.
Apps I Use for Productivity
I've listed below my favorite productivity apps. I've included the developer's name/company, a link to their website, and the current cost for the app.
Notability
Developer: Ginger Labs
Website: Notability
Cost: subscription - $4.99/month, $14.99/year
SimpleMind
Developer: SimpleApps
Website: SimpleMind
Cost: $10.99
Storyist
Developer: Storyist Software
Website: Storyist
Cost: $19.99
Affinity Photo 2 for iPad
Developer: Serif
Website: Affinity Photo 2
Cost: $18.49
Textastic
Developer: Alexander Blach
Website: Textastic
Cost: $9.99
Inspect Browser
Developer: Parallax Dynamics
Website: Inspect Browser
Cost: $7.99
If you found this article interesting or useful, please share the link to it with a friend: Ways to Use an iPad for Productivity.
If you want to view the next article, click the link below.
Ways to Use an iPad for Communication & News

